Archive for April, 2006
April 3, 2006 at 11:06 pm · Filed under Tips & Ideas
Now, before I launch into this diatribe about what tools I carry, I will tell you what I know you all want to hear: Eleanor arrived this afternoon, feeling fine. So 2/3 of our Tour family is back together. Emma will follow on Friday.
What I really want to talk about is tools. People often ask us what we carry with us to deal with those little household repairs and roadside situations that can crop up. I composed a list of what I carry in the trailer for your general info. While I can’t promise that this tool kit will deal with every emergency that could happen, it does suffice for 90% of what we encounter — and the rest I leave to professionals.
In a small blue fabric bag from Sears, I have the following items:
— small hammer
— screwdriver set
— drill bits and screwdriver bits for cordless drill
— tape: electrical, duct, & masking
— Gorilla glue
— (2) medium sized adjustable wrenches
— Reese hitch lube
— 3M silicone lube and graphite lube
— set of allen wrenches
— retractable safety knife (“carpet knife”)
— pliers
— small wire cutter/stripper tool
— plenty of misc screws, washers, and grommets
— one small bungee cord
— rivet tool
— small tube of Parbond, aluminum color
— small tube of GE Silicone II sealant, white, for kitchen and bath area
— assortment of “bullet hole” stickers
AND
— a small plastic “tackle box” or similar with internal compartments, with:
spare 1156 bulbs, glass fuses of varying amperage, several large cotter pins, single-sided razor blades, misc screws, several hose washers, 3/16″ POP rivets, Olympic rivets, mini 10w Halogen bulbs for the reading lamps, extra 303 Protectant samples for the Fantastic Vents (keeps ’em from sticking), automotive blade-style fuses (various sizes, open your Magnatek to see which ones you need).
I have used almost everything on the above list in the past year. No kidding! Things loosen, jiggle free, crack, and pop in thousands of miles of travel. With this kit you can fix almost any small problem without assistance. Without a kit like this, you could spend a lot of time visiting repair shops for little things, when you’d rather be having fun. And even if nothing goes wrong, the kit is useful for those little upgrades and personalizations you’ll want to do.
Also strongly recommended:
— cheap 12v air compressor with a looooong cord
— lug wrench (and be sure you have a spare tire and know how to change it, or you’ll end up waiting hours for roadside assistance someday!)
— cordless drill — very handy for setting stabilizers with appropriate socket and adapter
There are many other pieces of equipment you’ll want to have, but I’m only including the tools and parts here. Obviously you need extension cords, chocks, etc., but I’m assuming if you own an RV already you’ve figured that stuff out.
April 2, 2006 at 11:44 pm · Filed under Uncategorized
Today was my last full day of bachelorhood. Eleanor comes back Monday afternoon. (Emma will stay in Vermont a few more days with her grandparents.) And while I’m looking forward to see Eleanor, it was a great last day for me.
Florida is warming up into the 80s every day now, with endless sunshine and palm trees waving in the breeze. I took care of some business online and via phone in the morning, and then decided it was just the right sort of day for a bike ride.
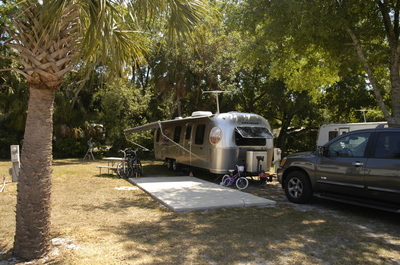
Our campsite. Click for a larger image!
So I called up Brett and we headed out to the Pinellas Trail, a rails-to-trails bikeway that runs north-south along the coast. I’ve taken the old bike rack off the Armada because I got sick of it and sold it on eBay (that’s another story that I’ll explain later, but in short we do have a solution to the bike problem). But without anyone else in the car it was a simple matter to toss the bikes in the back and head over to Tarpon Springs, just a few miles away.
I recommend the bike path. You’ll see some older “historic” downtowns, and there are plenty of opportunities to cut over a couple of blocks to the waterfront. The trail itself is mostly scenic and very easy to ride. We took it about 11 miles south before turning back. And we stopped for ice cream TWICE, so you know it was a nice day.
I’ve spotted enough things to do in this area that I think we will stay here two more weeks. There are 2-3 parks to check out, some nature trails, the Clearwater beaches, several interesting restaurants, and a couple more old downtown districts. Plus, Brett has promised to teach me how to swing a golf club some evening soon.
Tomorrow I’ve got to finish getting this trailer cleaned up for Eleanor’s return. I am trying to make her homecoming as pleasant as possible. This is the first time we will have been without a child since we launched our trip last October. It should be a fun week!
April 1, 2006 at 8:42 pm · Filed under Places to go
After a long week at work, Brett, Barry, and I decided to relax with a visit to Ybor City today.
“Ybor?”, you say. “That looks like a typo.”
No, Ybor City is a historic district of Tampa, where the cigars were (and continue to be) rolled by hand. Today Ybor City is a tourist district, but plenty of the original town still exists in the form of old tobacco workers’ homes, cigar factories, and museums. At night, the main street turns into a facsimile of New Orleans’ Bourbon Street, with bars and nightlife.
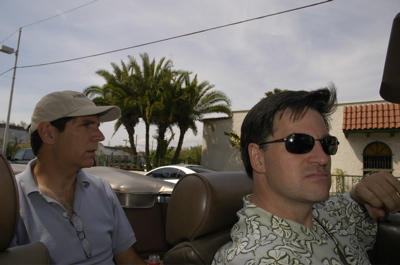
My two bachelor friends showed up at the trailer this morning, ready to cruise. (That’s Barry on the left, and Brett on the right. Brett is not sneering, he’s squinting because of the bright sun.) Now, technically I’m not a bachelor but I’m solo this week and that’s close enough. So we piled into Brett’s convertible and hit the open road …
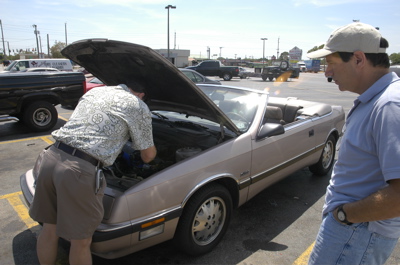
… with a stop along the way. The battery was useless. We had to jump start it, so our first destination was an auto parts store for a fresh battery, which Brett installed in the parking lot in about three minutes.
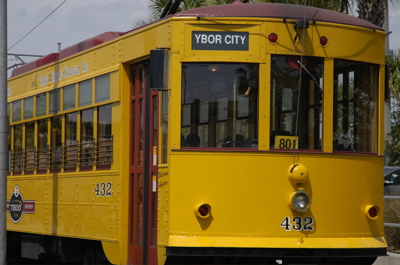
Ybor City is accessible by trolley car from downtown Tampa, but most people just drive right to Ybor and park there. Still, the trolley is a fun ride and worth the short roundtrip if you enjoy historic streetcars like I do.

Cigars are still made by hand all over Ybor. If you want to see how it is done, just walk into any one of the shops and ask. Most will do a demonstration while you watch, for free. If you want to take a lot of pictures like I did, a tip is appreciated.
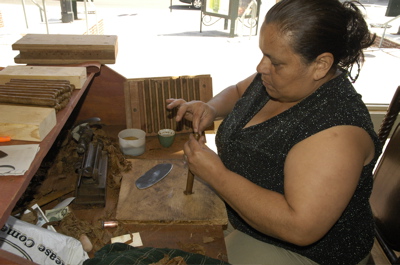
Lily made about six cigars while I watched, about one every minute. Her hands were so fast and skilled that I had trouble seeing some of the things she did. Even at 1/100th of a second, her hands were blurred in some of my photos.
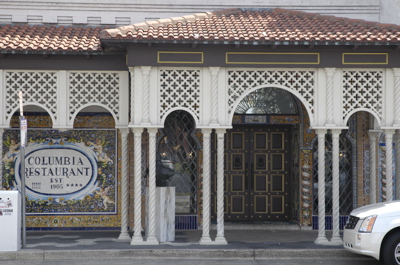
After a few visits, we dropped in on the Cuban restaurant, the Colombia. Although this restaurant now has six locations all over Florida, this is the original one, and the best. It now spans the entire city block, and it was very busy even at 2 pm. The waiters wear formal black and white, the menu includes filet mignon for lunch, but you can still pick up a Cuban sandwich for $6.95 if you want.
I can also recommend the local historical museum (small but interesting) and just browsing the architecture and historical markers around town. Ybor City has a reputation of being a spot for nightlife, but for those who value the past, it’s a fascinating place to visit any time of day.
I’ve uploaded a few more photos from Ybor City to the Flickr album. Click our “Pictures” link to see them.
« Previous entries


